Blend Testing
Blending Basics
“Volumetric Blending” sounds fancy, but it’s actually a very simple concept that can be applied to any type of recipe or ingredient.
For example, say we have a recipe for a Smoothie: 100g of fruit plus water:
We can use any type of fruit to make a smoothie, like bananas and strawberries:
Once we have two smoothies, we can blend equal volumes of each to create a combination, in this case Strawberry & Banana. This is known as a Line Blend.
We can expand the Line Blend to have as many steps as we like.
A line blend only allows us to mix two recipes. We can mix three recipes by using a triaxial. In the following triaxial we test blends of banana, strawberry, and pear smoothies:
The edges of a triaxial are simply line blends. For more interesting results, we can expand the triaxial. In an expanded triaxial, the inner tests blend all three recipes. In the following triaxial, the inner three tests blend banana, strawberry, and pear smoothies:
We can blend four different recipes in a biaxial. In the following biaxial we blend banana, strawberry, pear, and plum smoothies. Note that the inner test is a blend of all four smoothies:
As with the enlarged triaxial, we can test blends of all four recipes by enlarging the biaxial. In this example, we only need to mix four smoothies (the corners) in order to create twenty-five varieties of smoothies:
Blends in Ceramics
Line Blends
Line blends are a useful tool for comparing two different recipes. Often, the two recipes are different glazes. For instance, you can blend two different celadon glazes in different proportions to create a new celadon recipe. Line blends are also commonly used for testing additions of coloring oxides, for instance the effect of incrementally adding iron oxide to a clear glaze.
The range of the line blend is arbitrary- you can start each variable from 0% and go up to 100% or you could choose any range in-between.
To illustrate a line blend, here is a sample using two RGB colors blending by opacity. If you already know the result of the outlying 100% blends, you could remove them from the test. However, each firing is different and it’s usually good to test the 100% blends regardless.

You could mix each test in a line blend individually, but a much less time-consuming method is to only make the left and right-most solutions. Using a syringe, you can easily create each mixed blend.
Volumetric Blending
Ian Currie popularized volumetric blending. (See his article here. )
First, mix the same weight of each glaze you will be blending. Second, add some water to the glazes and sieve thoroughly. Third, add water to each glaze so that their volumes are equal. Now the two glazes are ready for blending.

Volumetric Blending in a Syringe
Below is an illustration of the blends in a 20ml syringe. If your test tiles are relatively small (7cm square) and flat, 20ml of solution should be enough for two coats of dipped glaze.

As you can see, for 10% increments using a 20ml syringe we need at least 20+18+16+14+12+10+8+6+4+2 = 110ml of each 100% recipe. Preparing 100 grams of glaze material for each glaze should be sufficient.
Each time before you take glaze into the syringe, be sure to re-mix the glaze and confirm it has not settled.
Line Blend Example
As a real-world example, let’s add red iron oxide the a reduction-fired clear glaze Leach 4321. We will create a line blend from 0% to 10% additional Red Iron Oxide in 1% increments. This is sufficient to see the gradual transition from clear to blue-green celadon (0.5-1%), light green celadon (2%), dark green celadon (3-4%), amber (5-6%), and tenmoku (7-10%).
First, two glaze batches of 100g are prepared. The first is just Leach 4321, while the second is Leach 4321 + 10% Red Iron Oxide.
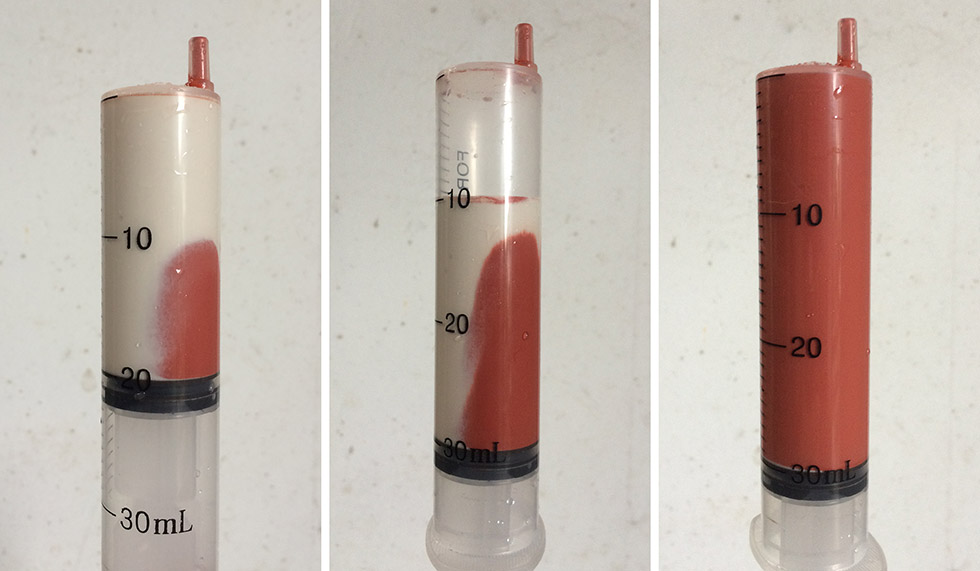
Second, a syringe is used to mix the two glazes in increments. By using a 30ml syringe there is extra room in the syringe for drawing in air, making it easier to mix the glazes.

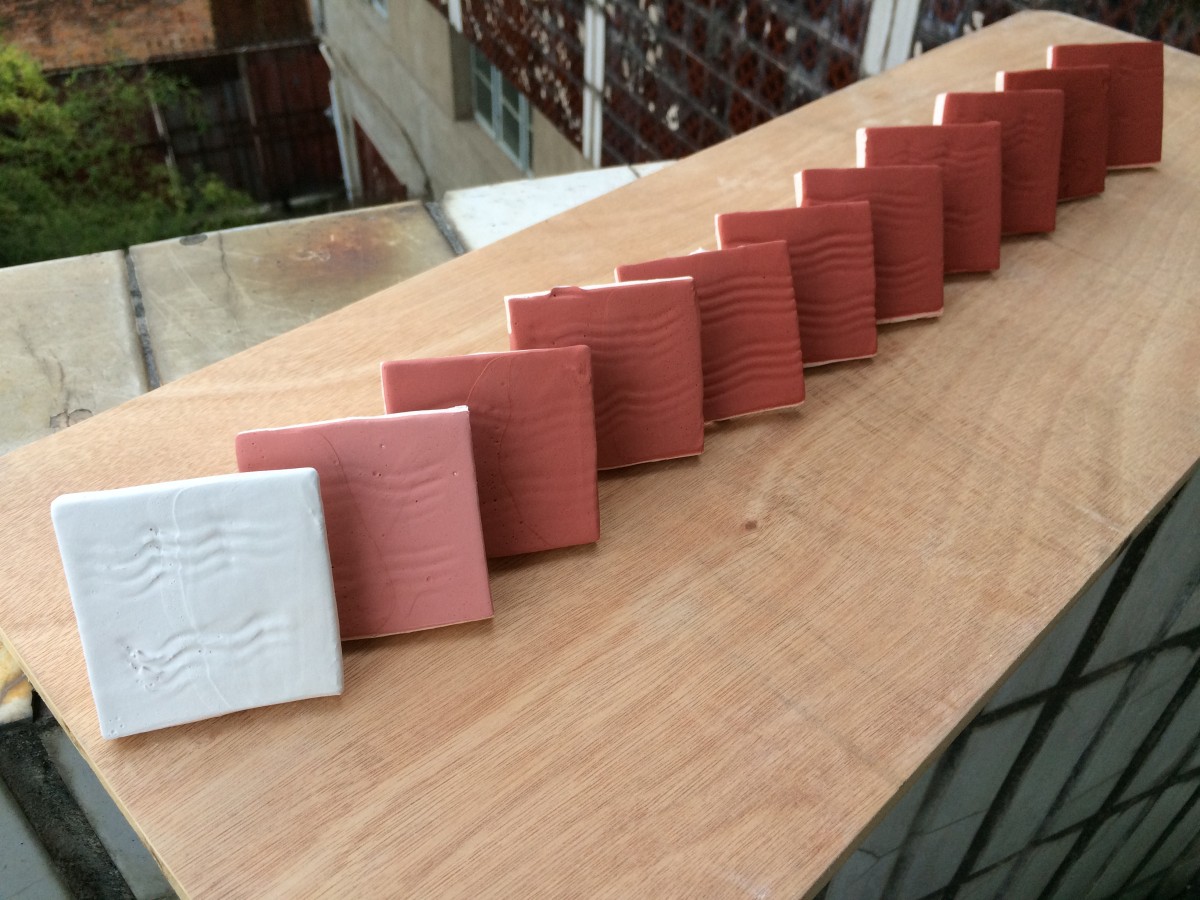
On the back of each test tile is written the glaze information. The test tile is dipped once in the glaze and then dipped again at an angle in order to cover half of the tile. The final line blend tests show a nice progression from 0% to 10% red iron oxide.

Here is the line blend after firing to Orton cone 10 in a reduction atmosphere. The tests reveal a range of interesting glazes.

The results of these tests can be viewed in Glazy:
- Leach 4321
- Leach 4321 + 1% Red Iron Oxide
- Leach 4321 + 2% Red Iron Oxide
- Leach 4321 + 3% Red Iron Oxide
- Leach 4321 + 4% Red Iron Oxide
- Leach 4321 + 5% Red Iron Oxide
- Leach 4321 + 6% Red Iron Oxide
- Leach 4321 + 7% Red Iron Oxide
- Leach 4321 + 8% Red Iron Oxide
- Leach 4321 + 9% Red Iron Oxide
- Leach 4321 + 10% Red Iron Oxide
Care should be taken when specifying the parameters of a line blend. For example, here is the result of a similar line blend created with Leach 4321 and cobalt oxide added.

As you can see, at 1% cobalt oxide the glaze is already a deep blue. Cobalt is a very strong oxide! It would have been more interesting to add cobalt in just 0.1% increments.

As you can see, at +0.1% cobalt oxide, the glaze color is already greatly affected. This test also highlights the need for sensitive, accurate scales when dealing with small batches of glaze.


